
Want to take stunning images of the night sky with just basic gear and no prior knowledge?
Here’s something you can do on a clear night in your garden, out of your window (as long as you don’t live in the middle of a big city) or in the field just outside your neighborhood.
This is your starting point and by no means the one and only way. Once you’ve experimented a few times you can play with the settings, let some clouds creep in the frame, blend foreground and background, use different number of images and so on, and get the results that you want.
PHOTOGRAPHING STAR TRAILS
Shooting for star trails is by far the easiest thing to shoot at night. It requires basic gear that you’re very likely to have at home or to be able to borrow or buy online without tapping into your savings, and a couple of free software tools. All you need is a camera (DSLR, Mirrorless, point-and-shoot) that has manual mode, standard wide angle lens (even a kit lens) and a decent tripod. The better the gear is, the easier it is to get good results, but it’s more important to just go out there (or stay in there) and practice. For an image for social media or small prints, even this basic equipment should be enough.
Shooting for star trails allows you to avoid common issues with night sky photography, such as exposure time, noise, and even light pollution in an amount that would not allow shooting of specific objects in the night sky that are closer to the horizon (again, as long as you aren’t in the middle of a big city).
Beyond a certain exposure time (dependent on sensor size and aperture), the perceived movement of the star becomes notable as they are no longer small round dots but rather a smear, an elongated bright line in the sky. Which is a deal breaker for some types of night sky images but an advantage for star trails shooting.
The free software used to create the final star trails image aligns and stacks the images so the final image shows relatively very little noise. Noise is created when using high ISO to increase the sensor’s sensitivity to light at night or when the sensor heats up due to long exposure times (less of an issue here though).
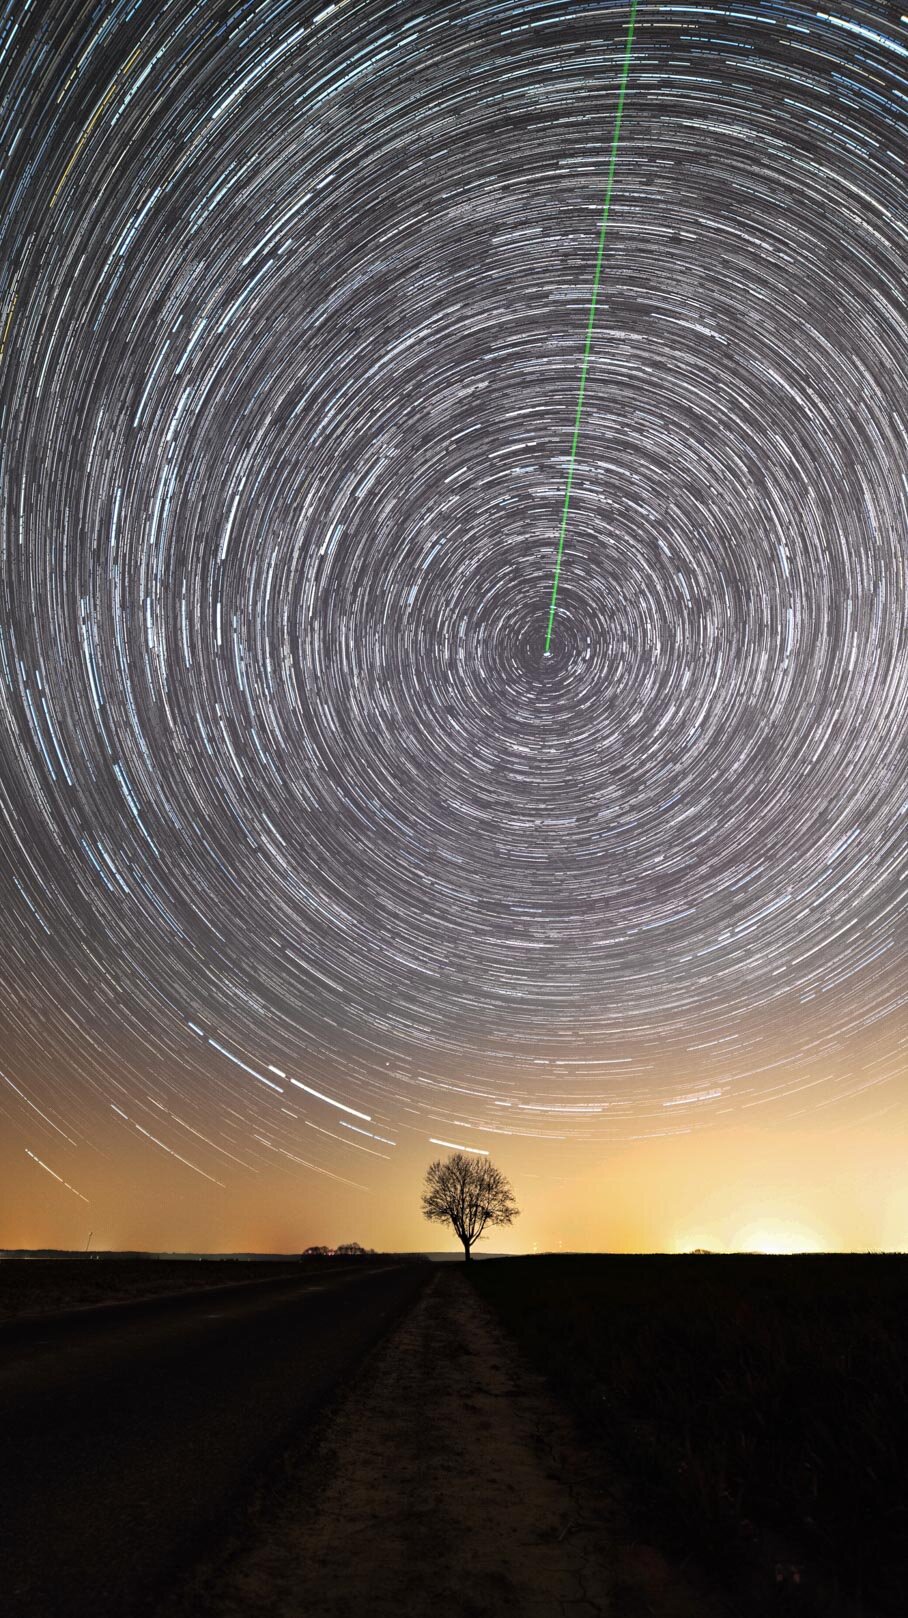
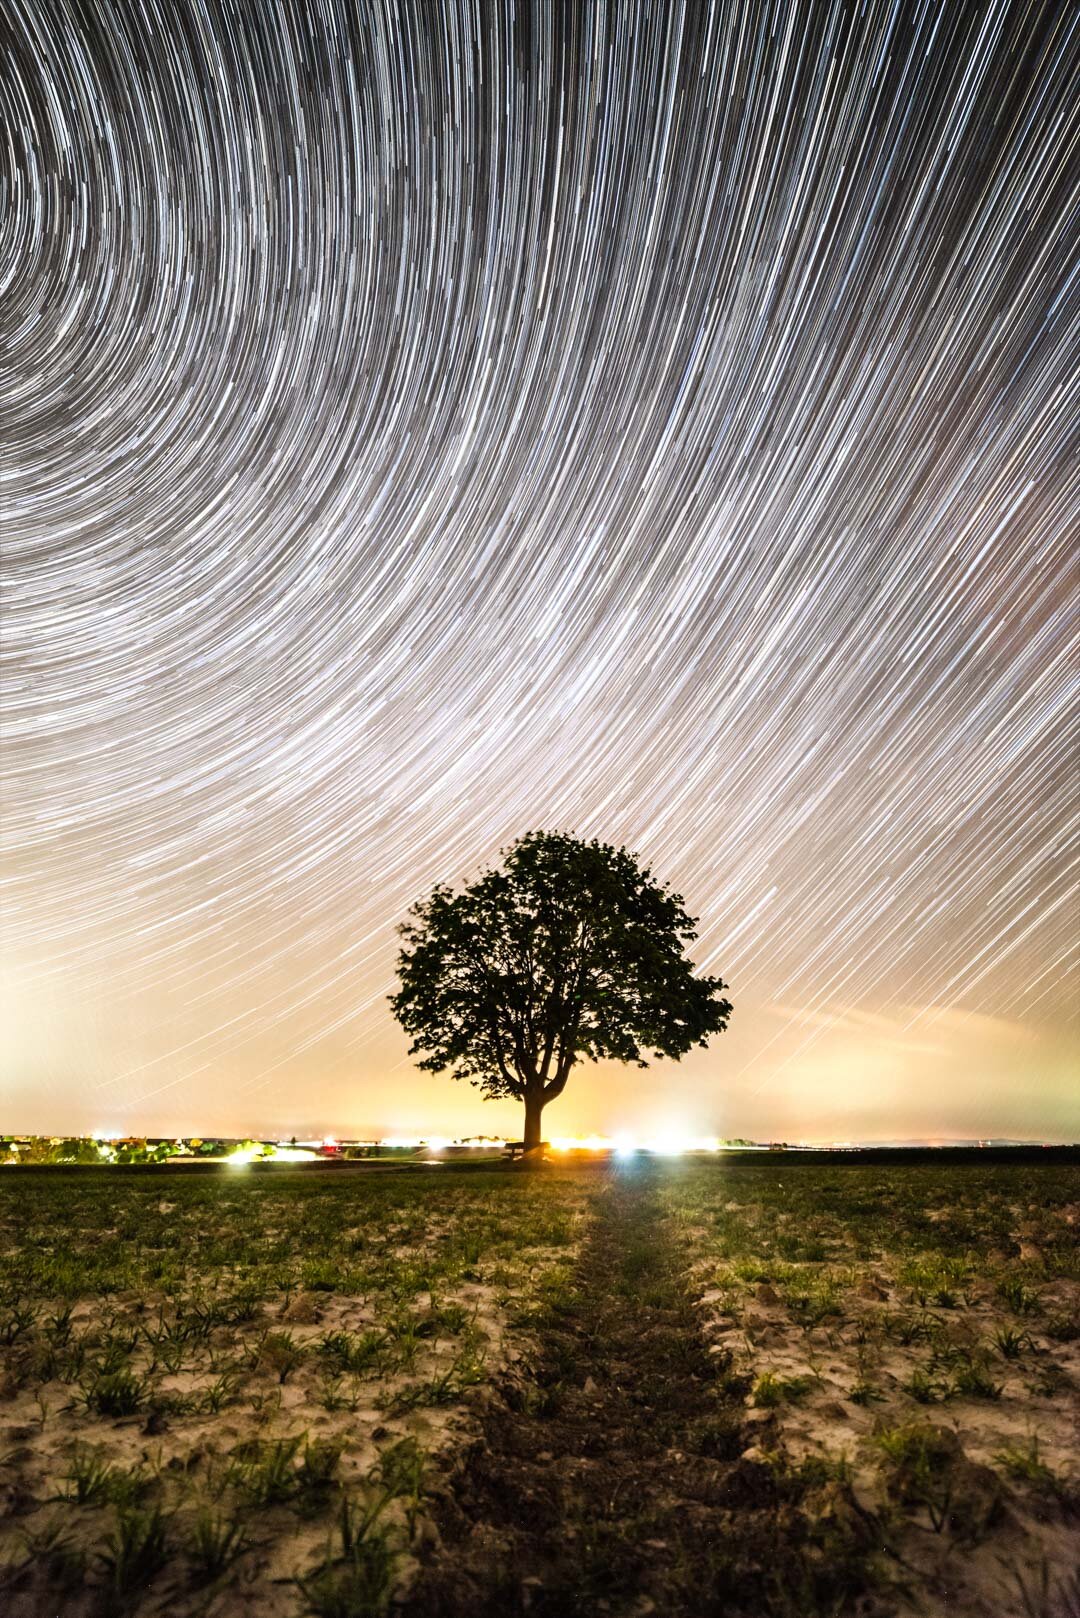
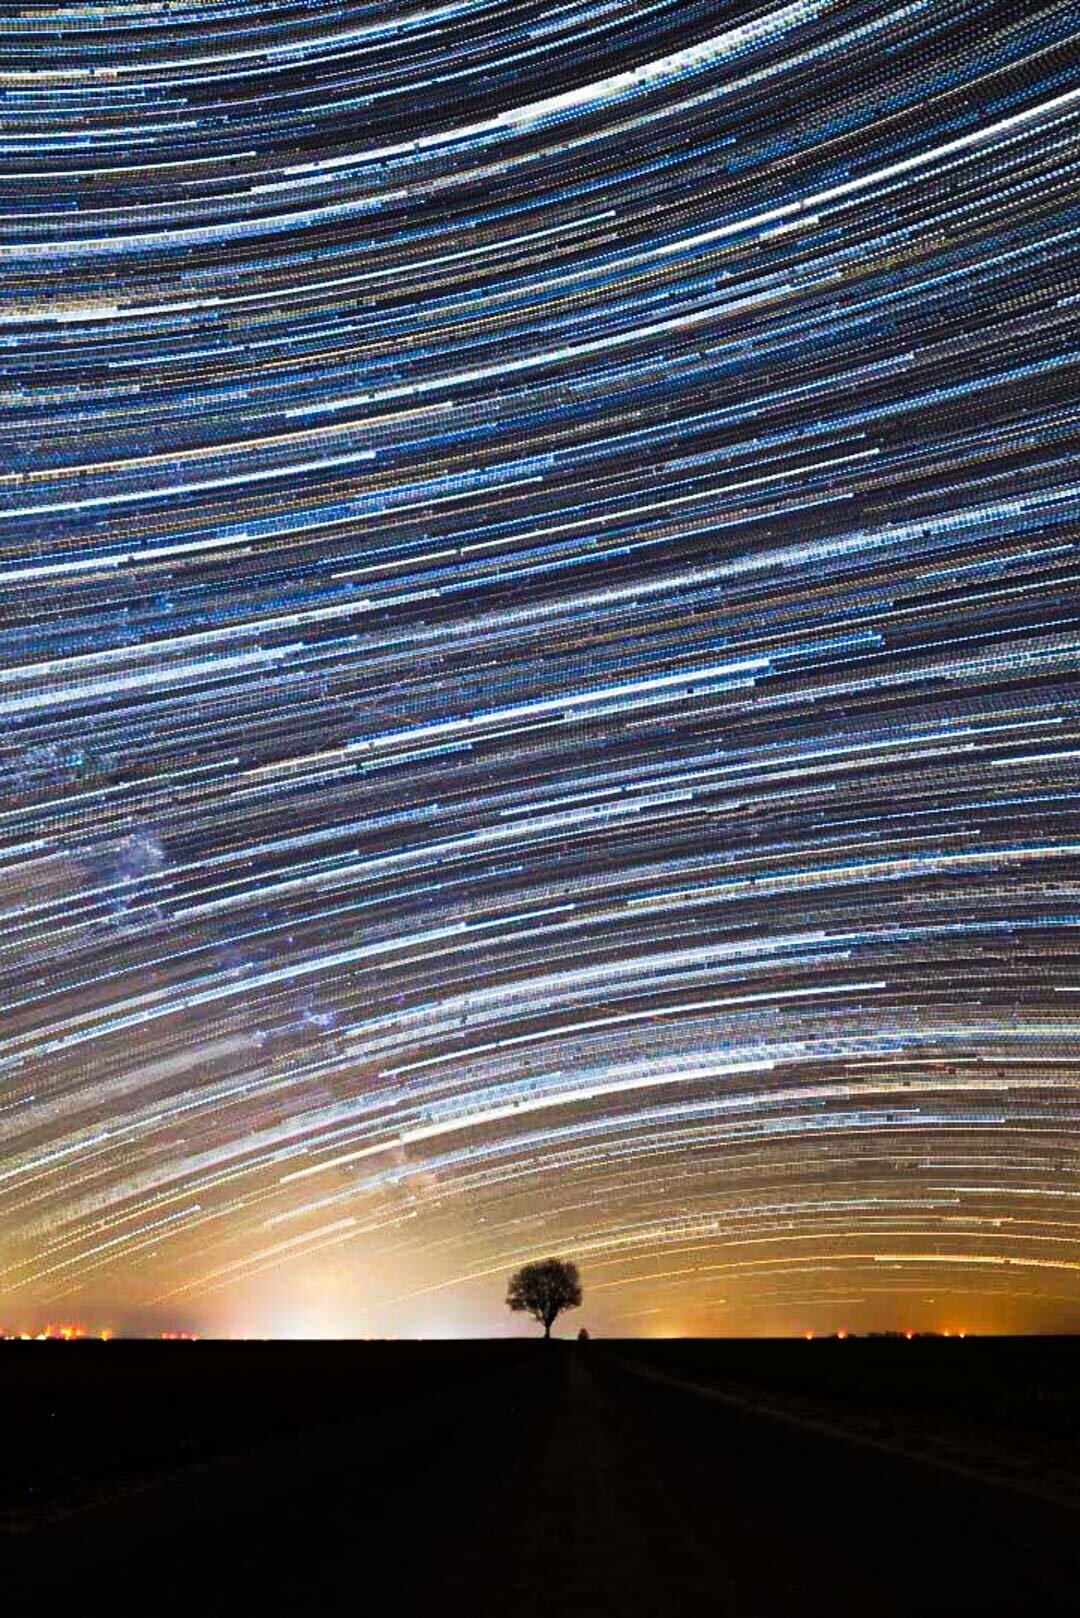
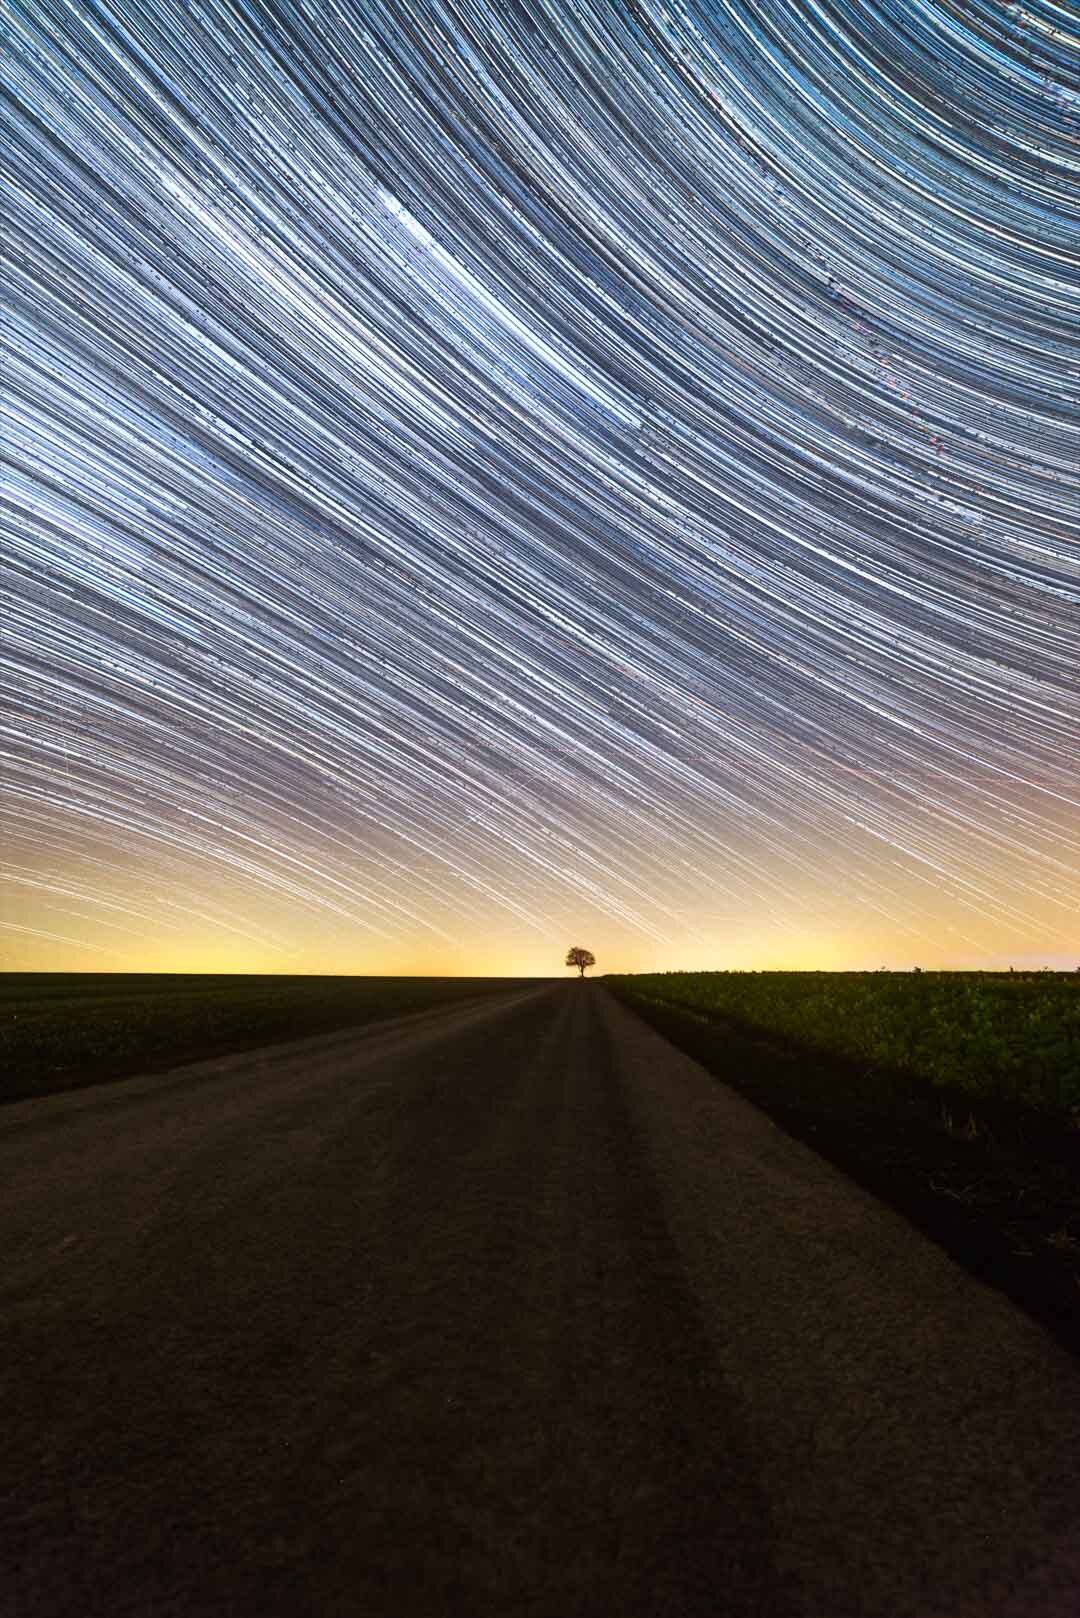
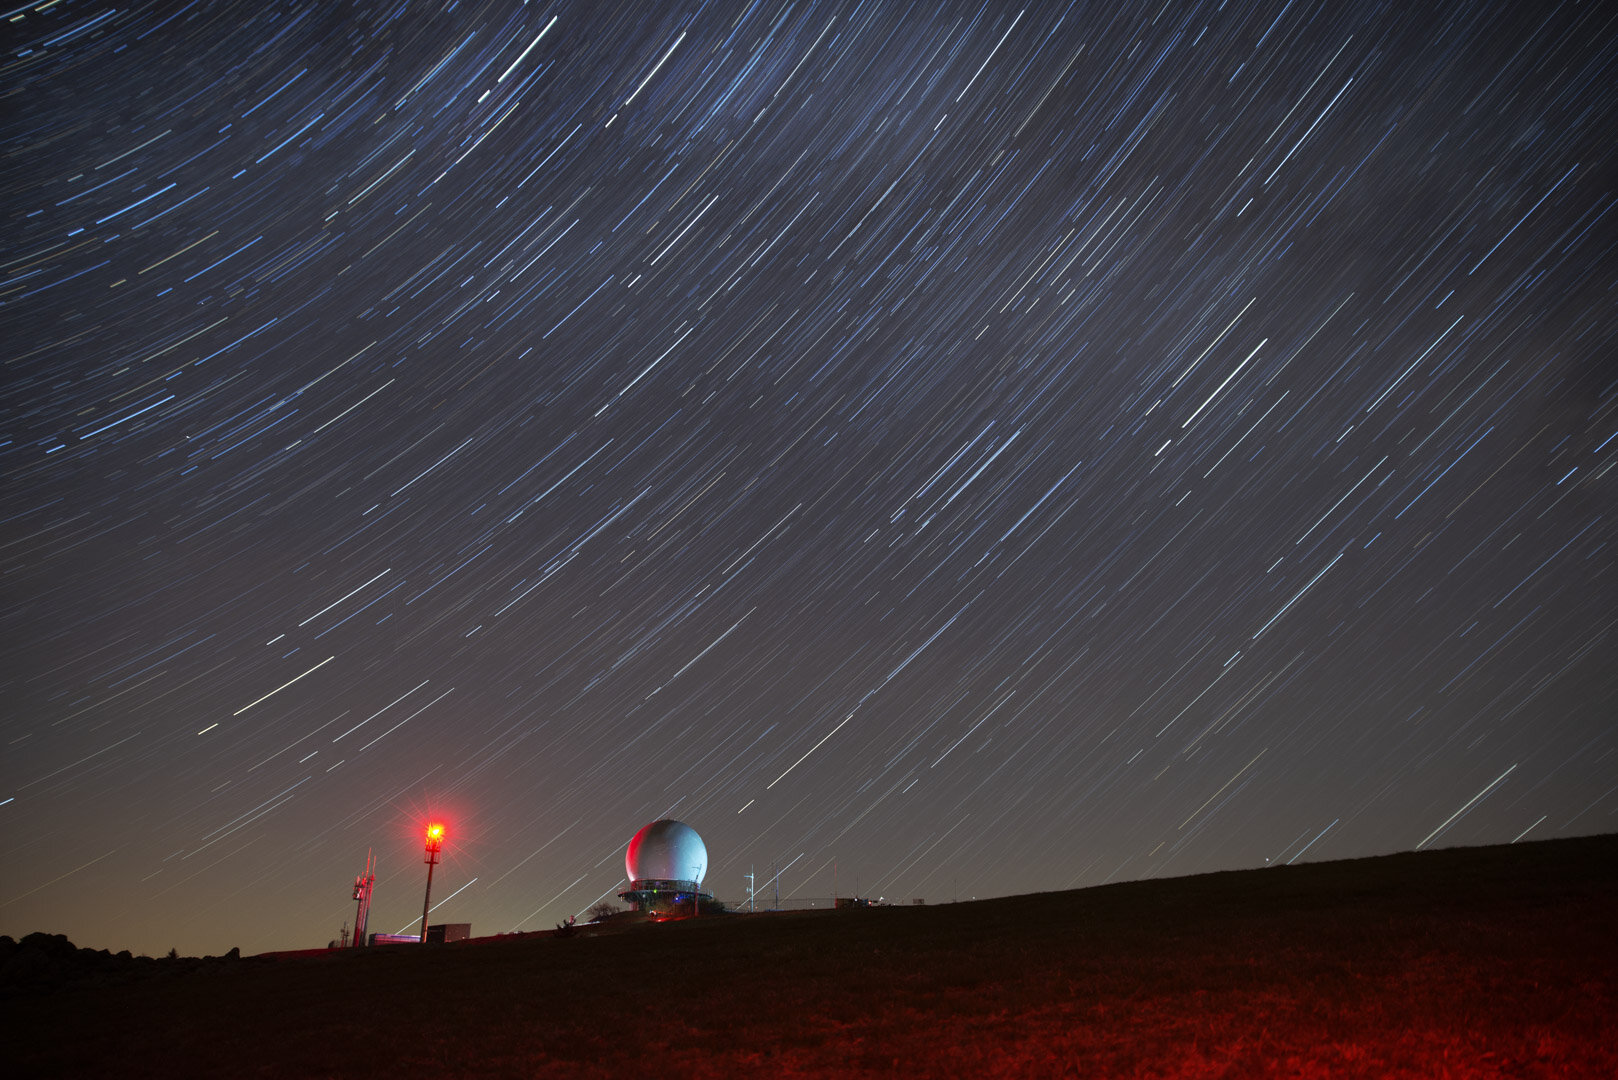
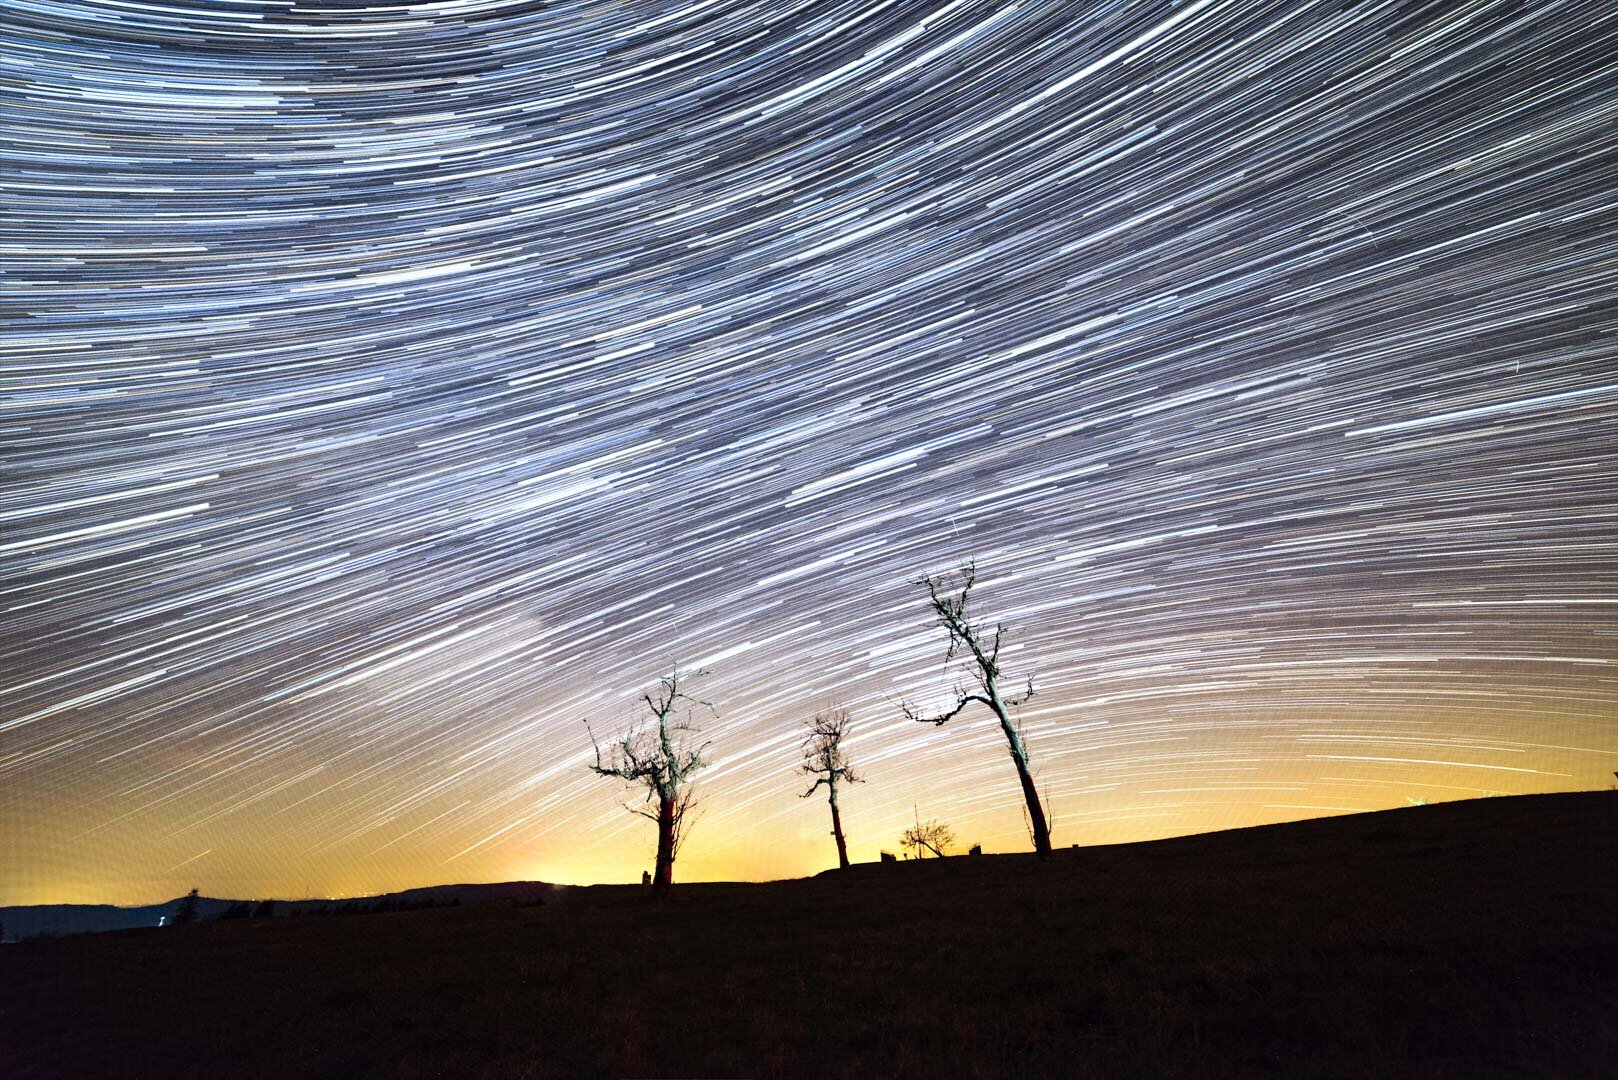
The images below show some examples of light pollution. 6 km to the south of the tree, and in the same elevation, there’s a small town with an industrial area that is very heavily lit 24/7. One km to the west of the tree and a little bit lower there’s a big village. A few km to the north of the tree there’s a city. A few hundred meter east of the tree there’s a warehouse with some serious perimeter lighting and another industrial area a little bit further down the road. As you can well see, the stripe of light pollution above the horizon doesn’t kill the image, but rather creates a bright background for the subject, allowing it to appear as a clear silhouette even in the dark of night.
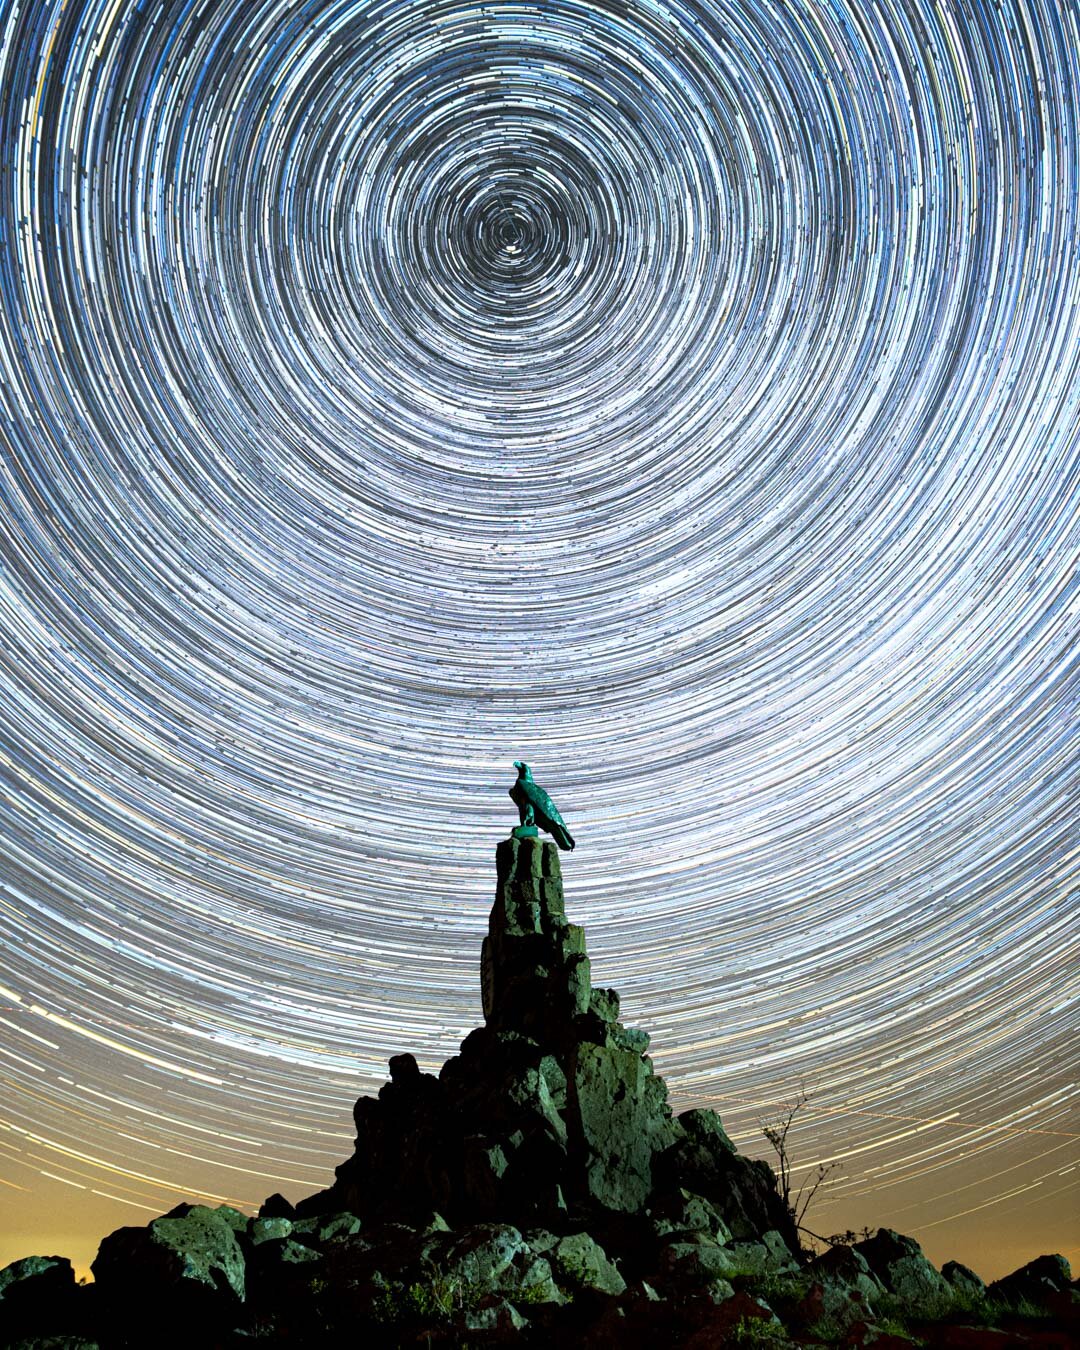
Here are some examples of star trails images shot with the same foreground subject but in different directions:
SHOOTING
Focus to infinity: During daytime, aim the camera at a distant object (just to be sure, more the 50 meters away) and auto-focus the camera.
Then turn off auto-focus and make sure not to touch the focus ring; if the lens has focus markings, take a picture of it with a smartphone for reference later. Most lenses have an infinity mark, but often it isn’t very accurate. There are other ways to focus at night but this one is the easiest and fastest.Shooting mode: Set your camera to manual (“M”) mode.
Focal length: for the beginning, Zoom the lens out to its widest focal length (smallest number possible) (learn more).
Make sure the stabilization function of the lens is disabled.
Shutter speed: Set the exposure time to the maximum possible (usually 30 seconds).
Aperture: Open the aperture as wide as it can go (smallest f-stop number possible).
White balance: choose a white balance mode other than Auto and do not change it during the shooting. I recommend a cooler setting, such as fluorescent (learn more).
File format: Decide whether you’re gonna shoot in RAW or JPEG format (learn more).
Attach the camera to a tripod and aim it at the sky (learn more).
ISO: Set a high ISO value, say 3200 for full-frame cameras and 6400 for crop sensor (APS-C) cameras. Take a shot and check the composition (learn more).
If the exposure is too dark or too bright, adjust the ISO setting up or down (learn more).
Use your camera’s interval shooting function to set continuous shooting. Do not use the time-lapse function as it will create a video, while we need single still images.
Set the interval time for 1 second to avoid gaps in the star trails. You can also use a cable release and just press and lock the trigger so the camera will shoot continuously.Let the camera capture as many images as possible, the more the better. For a start, anywhere between 100 and 500 will do. The more images, the smoother the lines will be (learn more).

POST-PROCESSING
STAR TRAILS IMAGE
Import the images to your computer. If you don’t use a program such as Lightroom, you can still process the images to a certain extent with the proprietary software that came with the camera (e.g. Nikon’s ViewNX). I find that in many cases there’s hardly any need for post-processing, so if you’re not comfortable with it, just skip that.
Browse through the images, delete any image that shows an interruption, like headlights (or other photographers stumbling around in the night with floodlights).
Download and install StarStax (free).
if you shot JPEG’s, skip to the next step.
If you shot in RAW format, make sure to export the images in JPEG or TIF format (TIF will allow for more post-processing, JPEG means smaller file and limited post-processing options).Open StarStax, select all of the images in the folder and drag-and-drop them into the left-hand panel (where it says, “Drop Images Here”).
On the right-hand panel, in the tab “Blending”, make sure that the “Blending Mode” is “Gap Filling”. You can test the other options later, but for now that should be enough.
If you’d like to also create a star trails video, check the box “Save after each step” at the bottom of the tab. This will display some more options, the important of which is choosing the image format (JPG as default), and selecting an “Output Folder” where the images created during the star trails processing will be saved.
Press Ctrl+P or click the fourth button from the left on the top bar to start the processing. Once it’s done, you’ll see the final image. Press Ctrl+S or click the third button from the left on the top button bar to select a location for saving the final image. Select the desired location and press “Save”. And that’s all.

StarStax User interface
STAR TRAILS VIDEO
If you checked the box “Save after each step” in StarStax, you now have a folder with the images that were used to create the star trails image. In each one of the images the trails are a little bit longer. You can easily turn them into a very impressive video.
Download and install LRTimelapse (free version).
Open the program. If it shows a warning message about DNG converter not being installed, just ignore it (click “OK”).
In the bottom-left panel, browse to the folder where you saved the images for the star trails video (step 7 in the previous section). Click once on the folder. The images will be loaded to the right-hand panel, might take a few seconds.
At the top of the right-hand panel, click the first tab, “Render Directly”. Click the button with the same name that appears under the tab name.
In the window that appears,you can choose where the video will be saved and under what name in “Output File”. If you leave the default, it will be saved one folder above the one that you specified in step 3.
Leave “Output Size” on the default, 1080p 1920x1080 (most other options aren’t available in the free version.
Under “Speed”, choose the “Frame rate” and the “Speed”. I usually only only change the speed, to 1/2 or 1/4. You can save two version and see what you like better. You’ll see the file name change to “xxx_2xSlow.mp4” according to your selection.
That’s it! Click “Render Video” on the bottom-right corner and enjoy your work.
Here’s an example of a star trails video:
March 2020 | Nikon D610 | Rokinon 14mm f/2.8 |
@ f/2.8 | 30 seconds | ISO 1600 |
122 images processed in Lightroom CC, StarStax, LRTimelapse
TIME LAPSE VIDEO
The process here is identical to the “Star trails video” above. The only difference is that in step 3 you should choose the folder with the original JPEG’s that you used for the star trails image. Below is an example of a milky way time lapse.
August 2019 | Nikon D610 | Tamron SP 24-70mm 2.8 VC USD |
@ f/2.8 | 15 seconds | ISO 4000 |
400+ images processed in Lightroom CC, StarStax, LRTimelapse
This is an almost three-hour long time lapse taken above Seealpsee mountain lake in Allgäu, Bavaria, Germany, in August 2020. Shot on a Nikon D610 with a Samyang 14mm.
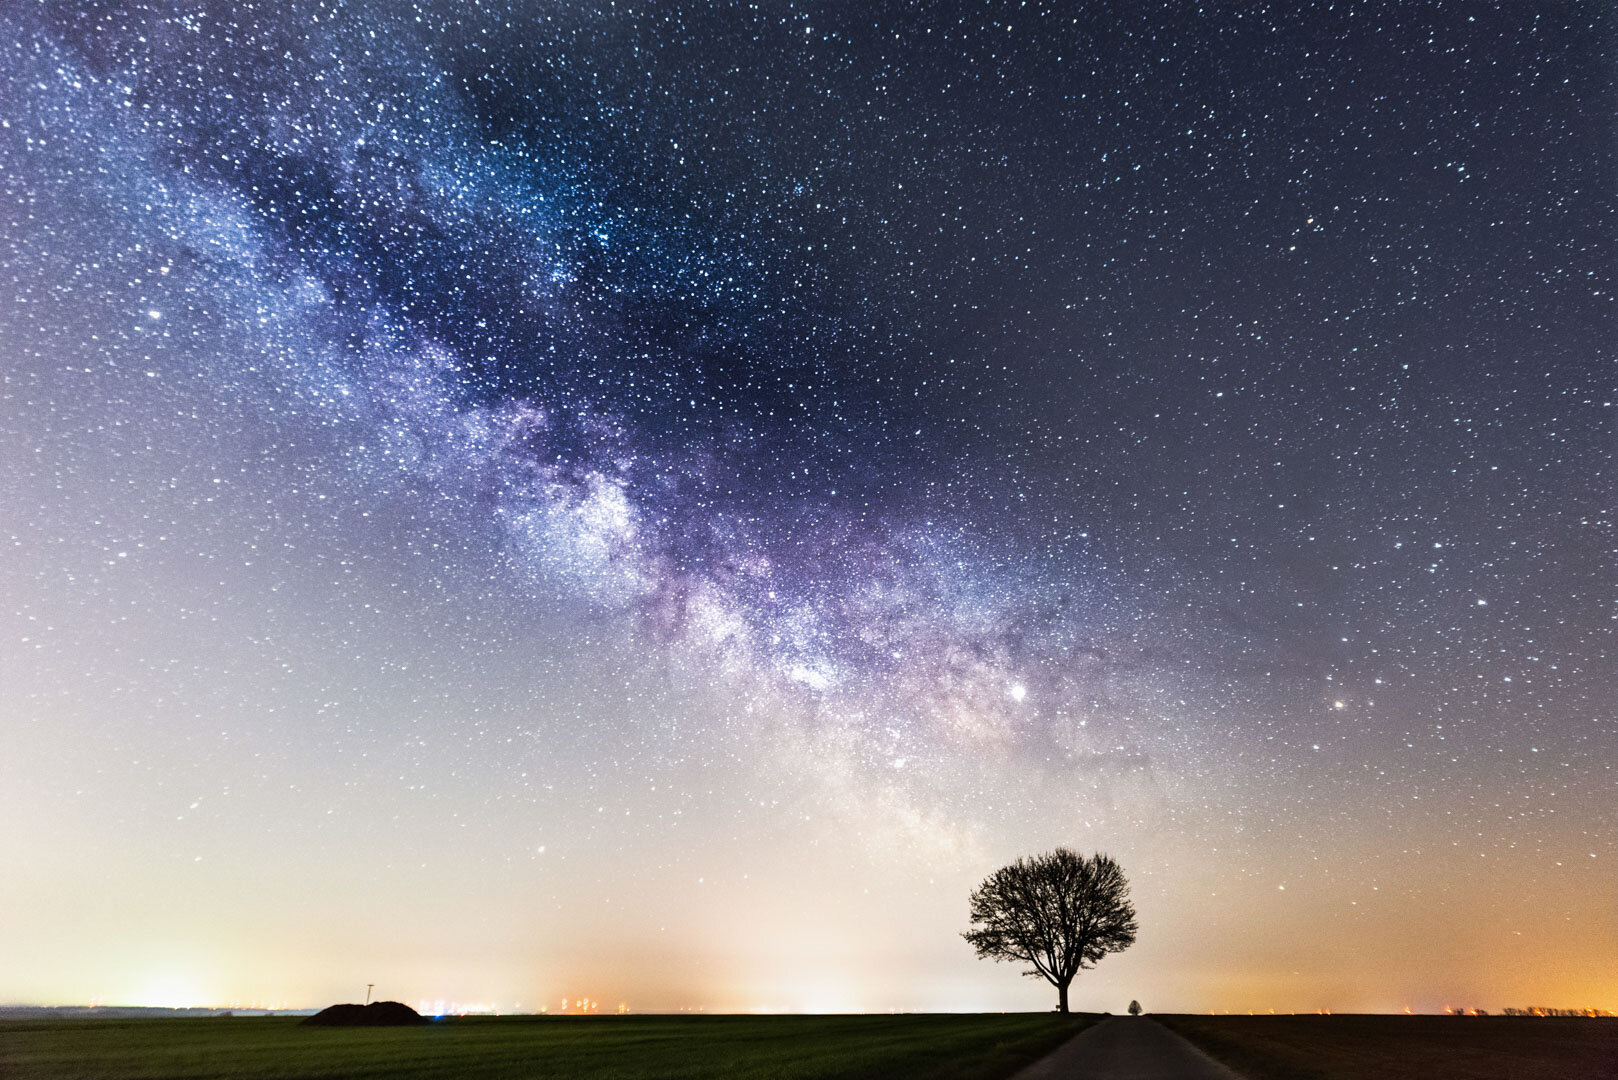
As you can see here, light pollution has an adverse effect on this milky way image: a part of the milky way core is practically erased by the light. With star trails, that’s not such a big issue.
March 2019 | Nikon D610 | Tamron SP 24-70mm 2.8 VC USD |
@ 24mm | f/2.8 | 15 seconds | ISO 4000 |
12 stacked images in Sequator | processed in Lightroom CC
Have questions, requests, good things or not-so-good things to say? Write me an email or a direct message on Instagram. Please feel free to share this tutorial with people you care about.